

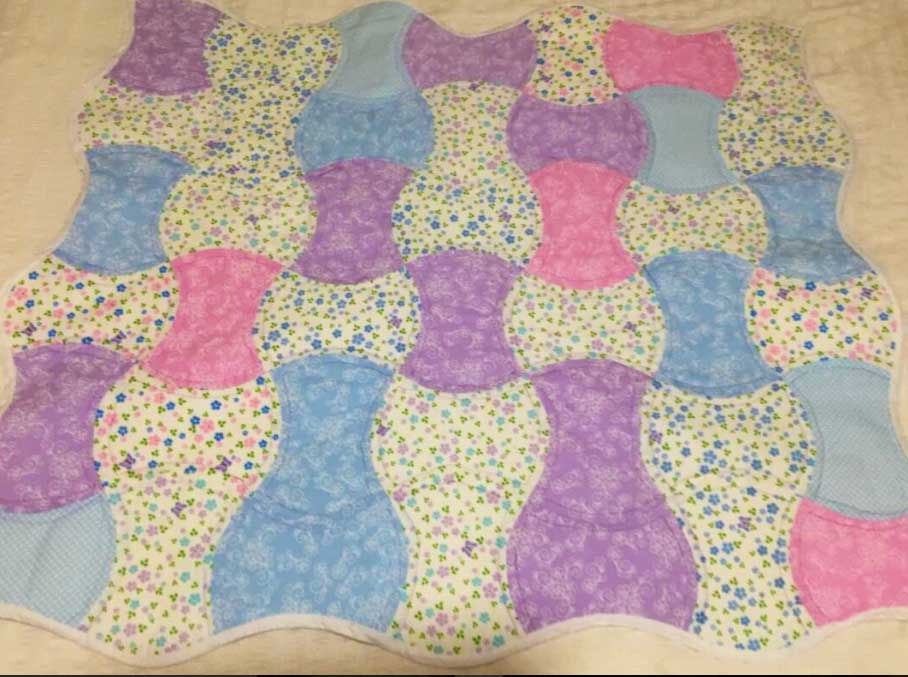
Sugar Almond Colours in an Apple Core Quilt
- Craft Cotton Co

- Jun 1, 2017
- 4 min read

This is a sweet little quilt and it can be made in a variety of sizes depending on the template that you use. This quilt has been made using an Accuquilt die and cut on an Accuquilt Go machine. It is quite a large die and because of that it was quite quick to make the quilt. If you can get access to a die cutting machine and an apple core die, you will have this ready in a flash. Alternatively you can purchase these templates quite easily or, you can make your own template by doing this:
Make an Apple Core Template:
Find a plate with a diameter the size you want your template to be. Put this onto a sheet of paper and draw around the plate.
Cut this circle out.
Fold this paper in half and then in quarters and run your finger along the folds to make a sharp crease. Open the paper and turn the circle to face you so the cross looks like an ‘X’.
Now use the plate again and slide it between the ‘X’ marks to take a ‘bite’out of the circle shape. Slide your plate until the edges meet the top and bottom of the X and mark the inside line (It makes a concave shape) repeat on the other side so the shape is symmetrical. Cut along the lines marked on the inside of the X and it reveals an ‘apple core’ template.
Remember that when you sew this in place, the seams will take away 1/4′′ on all sides so take this into consideration when using a plate or other object for your circle.
Cut out the green shape and that is your apple core template.
Remember that you need ¼” seams so be sure to take account of that measurement when you plan your template.
All the curves are exactly the same size.
Use the template with the tutorial or if you have another apple core template use that, you will need to calculate what fabric you need based on the size of the template and also remember to calculate for wadding, backing and binding.

Apple Core is a curved template with curved seams on every side, it is an organic shape and as most sewing is done in straight lines, this is different, so take your time and enjoy.
Arm yourself with lots of pins and match two pieces top curve to middle curve. Find the centre and work out towards the ends. If there are any notches or points on your template, make sure you match these up as it will make it so much easier. Sew with a medium length stitch and check that the curve lies flat when you open the two pieces. Finger press or iron the seam to one side, do not open the seam as it may weaken it.
The shapes go together like this:


Start by connecting the core’s in two’s. Then sew these together and begin to create rows of core shapes until it is wide enough. Make another full-length row then join it to another row. You need to note which shapes fit together to commence the row, they all intersect on either a horizontal or vertical curve, just match them up. Keep doing this until you have a quilt top that is both long and wide enough for your purpose. You can prepare the quilt top according to the pattern design of your choice. It is vital that you keep to a ¼”seam throughout. Iron each row as you go along and if necessary unpick and sew the seam again to ensure there are no puckers or pleats. Do not proceed if the seam does not lie flat you will be upset with yourself if you do!

Once your quilt top is complete, iron it well, you may want to put some spray starch on it to keep it crisp. Place the quilt top on a flat surface. Lay the wadding on top, it should be at least 1”larger all round. These layers need to be basted together. You can use spray glue or pins or tacking stitches. Take time and ensure there are no wrinkles in the top layer. The backing needs to go on top of the wadding, again use whatever method of basting suits you best. I tacked my layers and checked they were flat. Take the quilt and sew these 3 layers together. You can sew a row of stitches between the core shapes (quilt in the ditch), or as I did - echo quilting, which is sewing a line of stitching inside the core shape on every shape. This photo shows the back of the quilt and the outlines of all the ‘cores’.

This photo shows the echo quilting and the tacking that holds all the layers together until the quilt is stable and it is then removed. Quilting is done with a medium length stitch and it can be a matching colour thread or a contrasting thread. The bobbin thread can again be a different colour or whatever is best suited to how you want the quilt to look.

The quilt needs to be trimmed and prepared for binding. Binding can be standard ‘off the roll’ or made to match. I cut 2¼”strips on the bias because of the curvy shape of the quilt; the bias strips have a degree of stretch and are easier to work with. The strips were joined on an angle and I ironed into a standard twofold bias strip. Pin or tack the binding onto the quilt, sew the binding in place with a ¼”seam. Take time doing this, there are many curves to be sewn and the binding has to be kept straight and neat. Close the binding and finish the closing seam. Once the binding has been sewn to the front, flip the quilt and hand sew the binding to the back to complete the quilt.
Press the binding and give the whole quilt a final press.
Enjoy.


Comments