

Button Bunny Tutorial
- Craft Cotton Co
- Nov 3, 2020
- 3 min read
Project by Sarah Holliman at SarahJaneStitchery

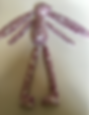
This little button jointed fabric bunny makes a gorgeous gift for any occasion. The pattern can be easily adapted and enlarged to create your very own version – just add imagination!
You will need:
Small amount of different fabrics from a Fabric quarter pack of choice for bunny and dresses
Small amount of felt for paw pads
Long darning Needle and strong thread
Embroidery floss in desired colours for nose, eyes and blanket stitching around the feet
Toy Stuffing
Buttons x4 for joints
Doll turning tool – I actually use a very fine crochet hook and a straw, which works equally as well.
Pins
Scissors
METHOD
1. Cut out the pattern pieces from the template along the thick black line.

2. Place the cut out pieces onto your fabric, you may wish to use different fabrics for the ears or limbs etc.
Make sure you take time to place the pattern pieces, avoiding wastage of fabric. If you are using patterned fabric make sure you pay attention to the direction of the pattern.
If your fabric is patterned make sure the body and legs templates are also in reverse to avoid two legs facing the same way !
3. When you are satisfied your piecing is correct pin in place.

4. Cut around the templates ROUGHLY leaving enough space to stitch directly up against the pattern.

5. Take the pinned pieces to the sewing machine. Make sure right sides are together and sew around the template line. If you sew over the paper template it does not matter as it can be easily removed. Make sure you leave gaps along the dotted lines so that the pieces can be turned inside out.

6. I double stitch around the templates for extra strength.
7. When all the pieces are stitched, cut around each piece leaving just a small seam.

8. Turn all the pieces inside out – I use a 3mm crochet hook and a straw, but a doll turning tool will also suffice. Take time to turn the pieces as they are very small. The rounded end of a crochet hook is useful for making sure the pieces are completely turned out.
9. Using toy stuffing, firmly stuff all the pieces (except the ears) .

10. On the legs you will need to attach a felt sole to the bottom of the foot.
I used a blanket stitch all around the pad, adding more stuffing as needed to make the foot firm.

11. Sew up the gaps in the ears and arms using small slipstitches.
12. Gather up the bottom of the body, using small gathering stitches and pull into place.
13. Attach a button to the top of each leg and sew in place before attaching to the body. I use pins to guide the placement of the legs on the body. When you are happy these are in the correct position, attach the legs to the body. I use a long darning needle or a doll needle to sew through the body, pulling the thread tight and sewing through the buttons as you go. I also recommend using double thread for extra strength.

14. Attach the arms in the same way.

15. Attach the ears to the head, making sure they are level and sew in place.
16. Using a small amount of embroidery thread, embroider a little nose on the bunny using a few satin stitches.
17. Using pins as a guide as to where you want to place the bunny’s eyes, embroider two French knots using a dark colour embroidery thread.
18. For the bunny’s dress cut 2 pieces of fabric 14cmx14cm
19. Sew a small 5mm hem at the top and bottom of the dress

20. Sew up two thirds of the side of the dress leaving the top third open (this is the armhole). Side the opposite side of the dress to match.

21. Turn back the two edges of each side of the top of the dress, as shown, and stitch in place. This creates a dress shape.
22. Turn the dress inside out and sew the top neck edge of the dress onto the bunny using tiny gathering stitches.

Your bunny is ready to accessorise as you wish!

To see more from Sarah, visit her on Instagram @sjstitchery
Made by Sarah Holliman for The Craft Cotton Company 2020