

Just Bake door stop
- Craft Cotton Co

- Jul 13, 2017
- 2 min read
Combining the usefulness of a doorstop with the lovely patterns of the just bake fat quarter set make this door stop a must have accessory for your kitchen.
What you will need:
Pins
Scissors/rotary cutter (and cutting mat)
Ruler
Pins/sewing clips
Thread
Weight for your doorstop (dried beans, gravel, plastic beads, rice, sand – anything that will provide some weight)
Batting
Toy stuffing
Step 1 - Take one of the pink cooking item patterned fabric quarters and cut 2 squares 11x11 cm to make your top and bottom piece, and 4 pieces 11 x 4 cm for the bottom of the side pieces.
Step 2 - Pick two of the fat quarter colours and cut a strip 5x15 cm out of each for the handle.
Step 3 - Take the four other pattern quarters and cut a 14x14 cm square out of each one, then cut each square into 4 strips (3.5 cm in width)

Step 4 - Put the strips into 4 groups so you have one of each fabric pattern in each group.
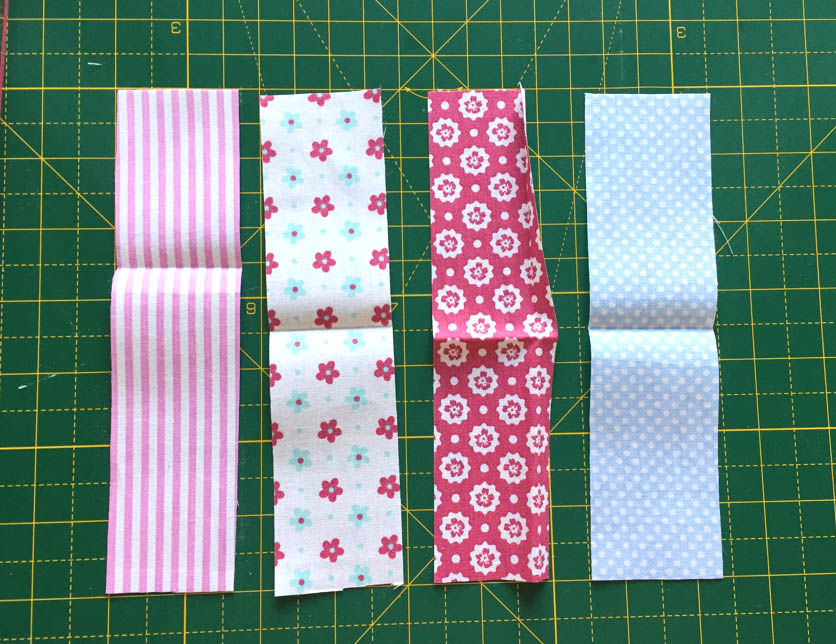
Step 5 - Take the first group of 4 and sew together by placing the first strip right sides together with the second and sewing down the left side edge, repeat this with the third and fourth strips until all four pieces are sewn together. Repeat for the remaining 3 groups. Trim if need be so they are 11 x 11 cm in size. This gives you 4 side pieces.

Step 6 - Take the bottom side pieces and sew onto the bottom of each side piece by placing right sides together and sewing along the bottom edge.

Step 7 - Cut out your batting, 2 pieces 11x11 cm (top and bottom), 4 pieces 11 x 14 cm (the 4 sides), and 1 piece 5 x 15 cm (handle).
Step 8 - Add the quilted detail to the top and bottom and the side pieces.

Step 9 - Sew the 4 side pieces together by placing the first and second side piece right sides together and sewing down the edge, making sure you leave a gap of 1 cm from the top and bottom unsewn. Repeat with the remaining side pieces until all four are joined. Then sew the edges of the first and last square together (placing right sides together and sewing down the side edge) to make a square.


Step 10 - Sew the handle by placing the batting then a piece of fabric right way up and the next piece of fabric right side down and sew down each of the side edges. Turn the right way out.

Step 11 - Attach on the top of the door stop to the sides placing the handle down the middle of the top piece and pinning the side pieces in place. Sew around leaving a 8 cm gap for turning on one side.


Step 12 - Attach the bottom piece by pinning the bottom piece on and sewing the whole way around.
Step 13 - Fill about ½ of the door stop with your weight and fill the rest with stuffing.
Step 14 - Slip stich the gap closed.


Made by Lesley Foster for the Craft Cotton Co 2017
Visit her blog https://hookstitchsew.com/


Comments