

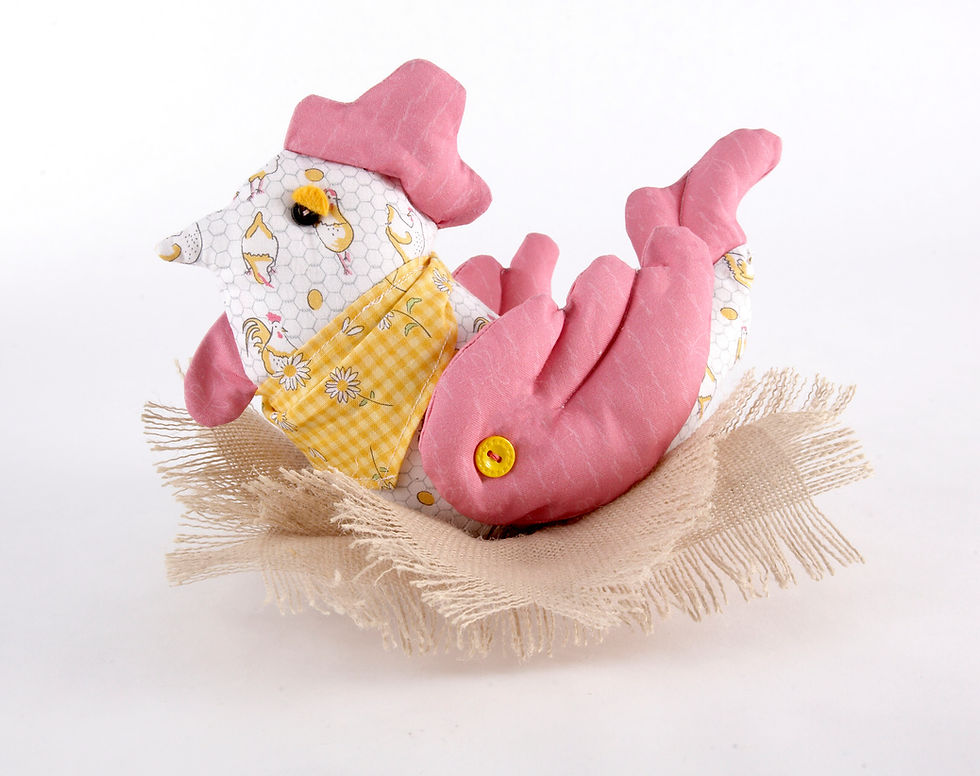
Nesting Chick by Debbie Shore
- Craft Cotton Co

- Jun 5, 2018
- 3 min read

This quirky character would brighten up any kitchen, try putting a weight such as a pebble or a small bag of sand in the base to make her into a paper weight!
Use a small stitch on your sewing machine to prevent strain on the seams when stuffing.
Materials:
11” x 16” chicken fabric
10” x 14” contrast fabric for the wings, tail comb and wattle
14” x 5” fabric for the neckerchief
Scraps of felt for eyelids
2 x small black buttons for eyes
2 buttons for the wings
2 x 9” squares of hessian
Toy filler
Strong wet fabric glue
1. Download and print templates. Cut out two body pieces from chicken fabric. Fold the contrast fabric in half right sides together and trace around the comb, wattle, wings and tail patterns. Use a small stitch on your sewing machine and sew all around the wings, but on the remaining pieces leave the straight edges unstitched. Remember to back stitch at the start and end of your work to prevent the stitches from unravelling!
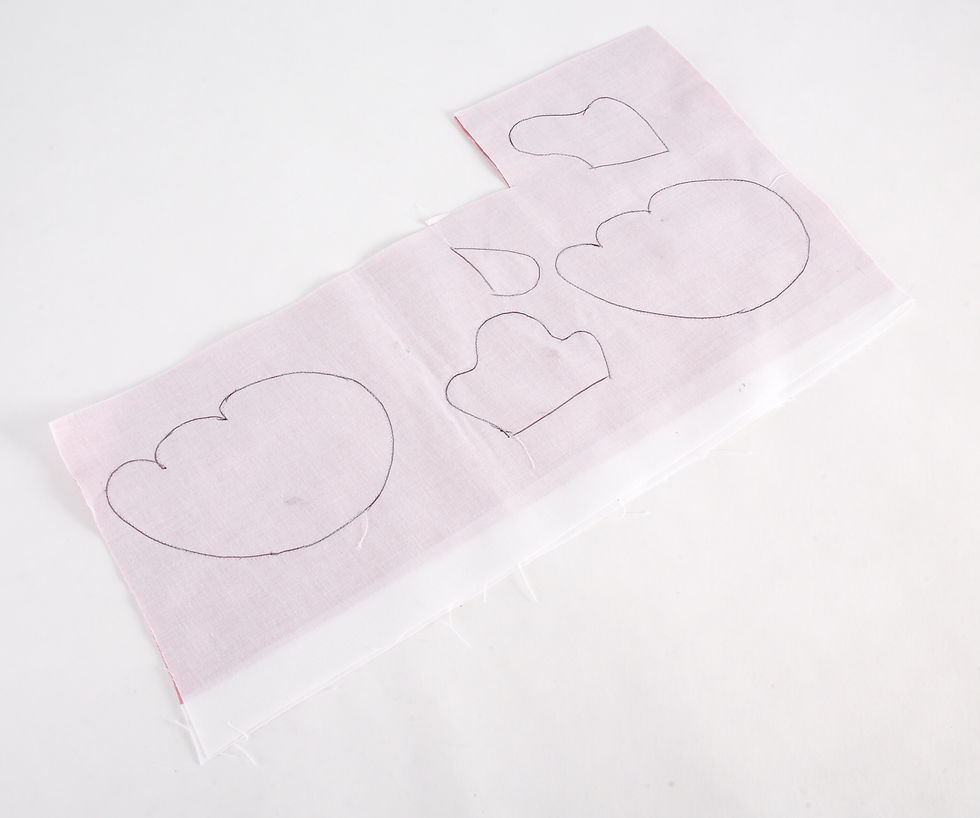
2. Cut around all the shapes with an 1/8” seam allowance. Make a small incision into one side of the wings, positioned as you see in the picture. Make sure you mirror-image the wings before you make the cuts. Snip into the curves of the seam allowance and turn the right side out. Press.

3. Turn the tail, comb and wattle the right sides out, then stuff lightly with toy filler. Don’t over-stuff these pieces, they’re meant to be floppy and will be difficult to sew with too much filler.
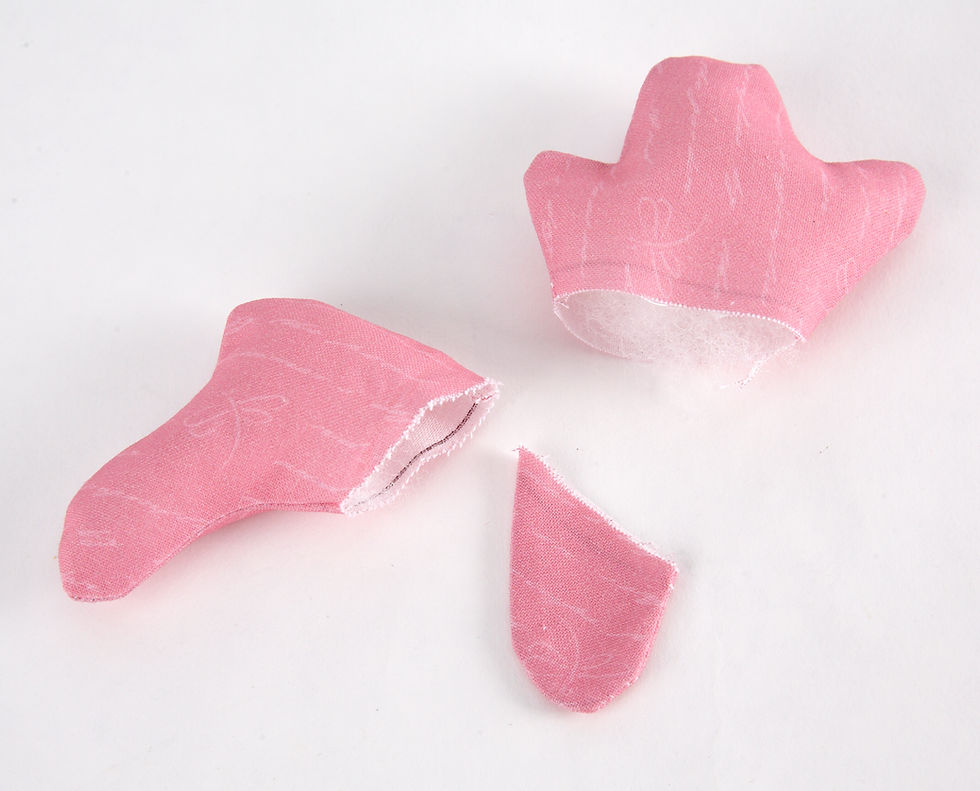
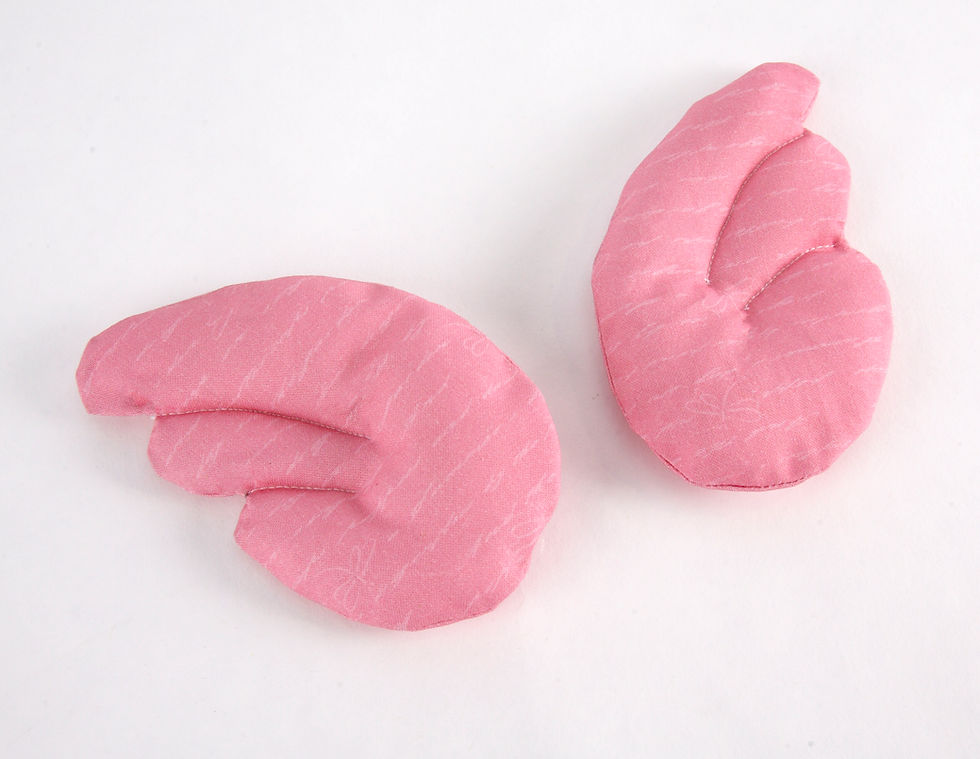
4. Stuff the wings through the small incisions. Draw a couple of lines with an erasable ink pen over the wings to form feathers, then sew.
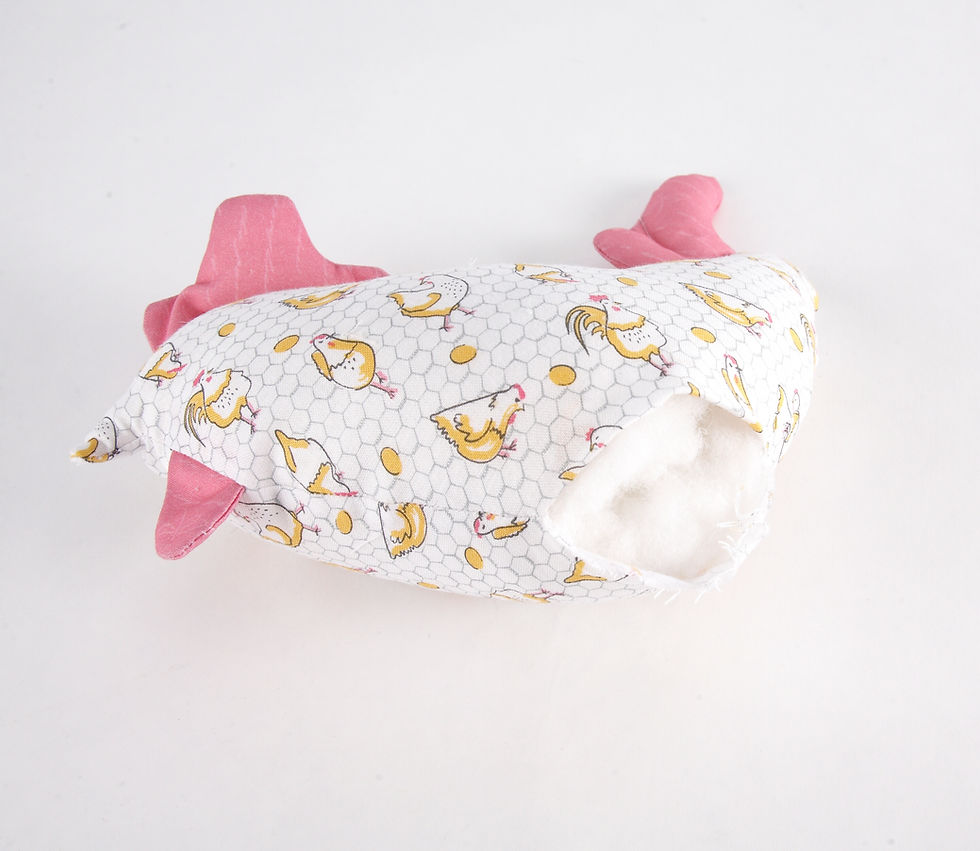
5. Tack the comb to the top of the head, the wattle just under the beak, and the tail to the chickens back, all facing inwards. Tack the tail ¼” from the edge of the body to allow for a seam allowance.

6. Place the two body pieces right sides together and sew all the way around with a ¼” seam allowance, leaving a turning gap in the bottom of about 3”. Push the tail out of the way as you some to that part so you don’t trap it in the seam. Snip into the curves then turn the right side out. Stuff firmly with toy filler. The comb can either sit straight on the head, or flop to one side.
7. Sew the opening closed by hand, don’t worry about your stitching being too neat, you won’t see them! Sew a button to each wing, then hand sew the wings either side of the body. [Glue if you prefer] Sew the small black buttons to either side of the face, taking the needle straight through the head. Pull the thread slightly as you sew, this will give the face a little character.

8. Cut out the neckerchief, fold over the edges and top stitch to and hem all the way round.

9. Take the two hessian squares and fray the edges by about 1”.
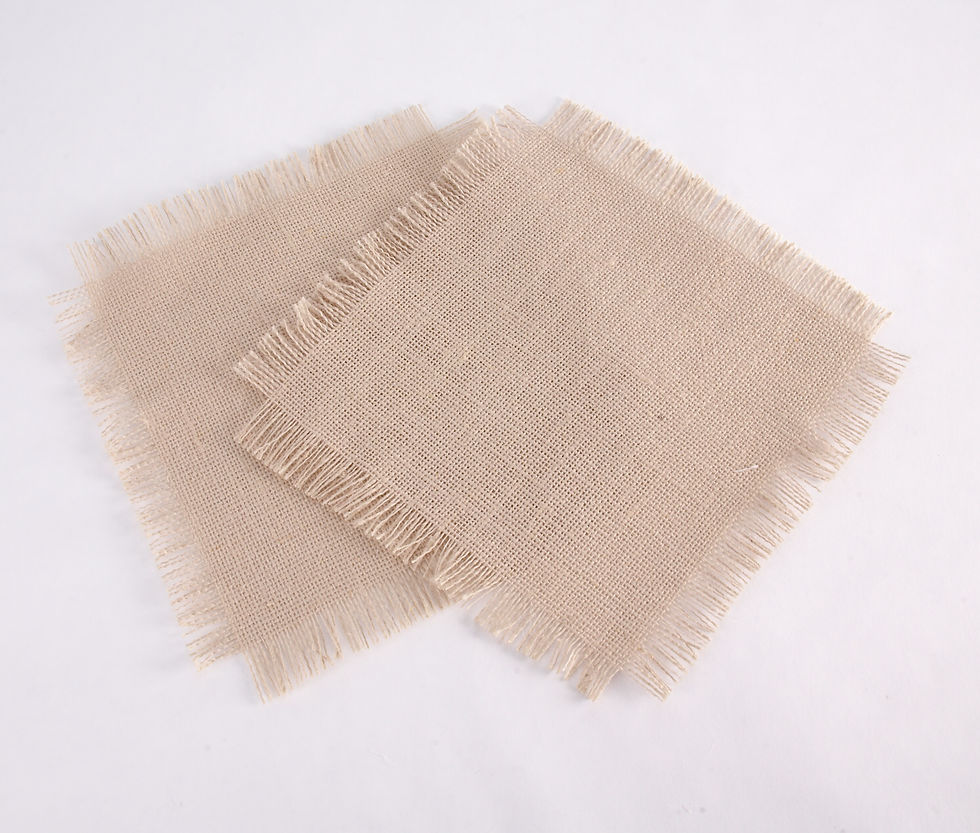
10. Place the two pieces together at an angle, and secure with a dot of glue in the centre. Draw a 4” circle in the middle, then make a running stitch with strong thread around the circle.

11. Pull the thread to gather slightly and knot. Drizzle glue around the gathered circle and sit your chick in her nest! Tie the neckerchief around her neck and she’s dressed to impress. It was at this point I thought I’d two small semi-circles of felt just over the button eyes to give my chick a bit of character!


Comments