

Small Seahorse Bag
- Craft Cotton Co

- Jan 28, 2021
- 3 min read
Project by Stephanie Marsh

You will need:
4 fat quarters Wadding R-Form bag strapping 1 large button Thread
To make the pattern:
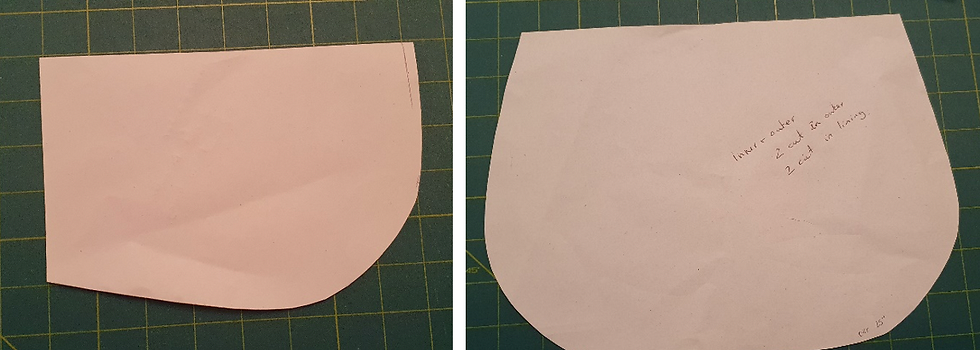
1. Take an A4 piece of paper, fold it in half widthways. Draw one half of a bag shape, as below onto this, rounding off the corners and sloping into the top, add 1/5 inch all around for seam allowance cut out’
2. Measure around the curved edge, on the sewing line, not the outer edge, cut a strip of paper this length, 4.5 inches wide, fold in half lengthwise. Taper from one short edge to the other, making the edge for the top of the bag 1.75 inches. This is the bag gusset.

3. Top yoke – 10.5 inches x 3 inches
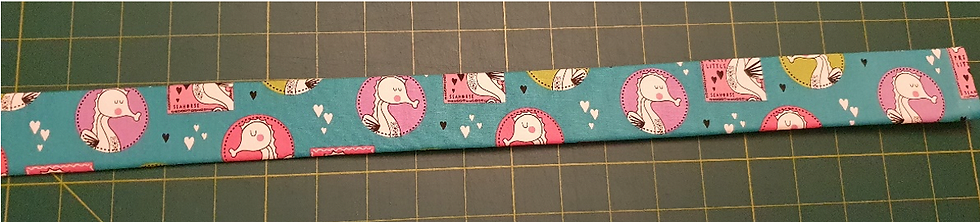
Frill – 17.5 inches x 3 inches
Handle – 21 inches x 4.5 inches
Button loop – 2 inches x 9 inches
Cut the following in fabric:
2 x main bag outer
2 x main bag lining
2 x bag gusset
2 x bag gusset lining
4 x yoke
4 x frill
1 x handle
1 x button loop
Cut the following in wadding:
2 x main bag 2 x bag gusset 2 x yoke Cut the following in r-from bag strapping:
1 x handle 21 inches long.
Instructions:
1. Take the handle fabric piece and press 0.5 inches on ling edges to wrong side. Place the r- form stabiliser handle pieces in the centre, lengthways and press in place. Wrap the fabric around the stabiliser and stitch in place using a few rows on evenly spaced top stitching.
2. Pin the wadding to wrong side of the relevant pieces.
3. Join the gusset pieces together on the longer of the short edges of the outer fabric, press seam allowances open.
4. Pin the longer edges against the curved edge of the main outside bag. Stitch in place, press seam allowance towards gusset. Repeat on other side.

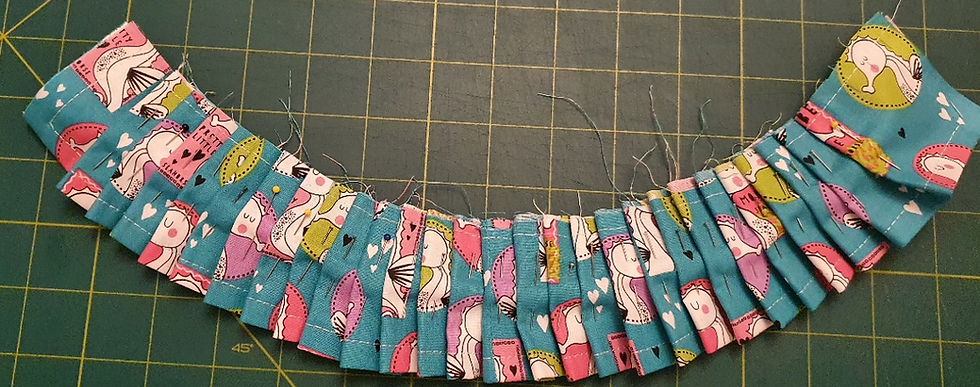
5. Take 2 frills pieces and stitch together on one of the short edges. Repeat with 2 other pieces, press seams open. Place the 2 strips right sides together, sew around the 2 short edges and one of the long edges, trim seam allowance, clip corners and turn right sides out, press flat. Press pleats in place, approximately every half inch or so.
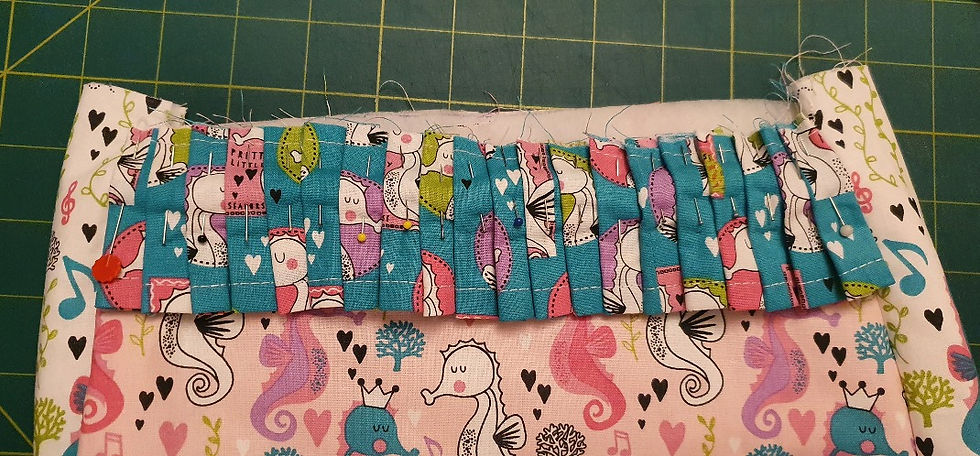
6. Place raw edge of frill across top of right side of outer bag. Pin and tack in place.
7. Take the button loop strip of fabric and iron in half lengthways, then open out and press raw edges into centre then re press in half again, lengthwise, stitch in place. Fold in half, widthways, pin and tack in the centre of the top of the outer bag back.

8. Take 2 yoke pieces, right sides together, stitch around the 2 short edges, and the long edge. Turn right sides out and press. Repeat with the other 2 pieces. With raw edges matching place the yoke pieces on the back and front of outer bag, pin and tack in place.

9. Pin and tack the handles in place, raw edges matching.

10. Make the bag lining the same as the outer bag, see steps 3 and 4.
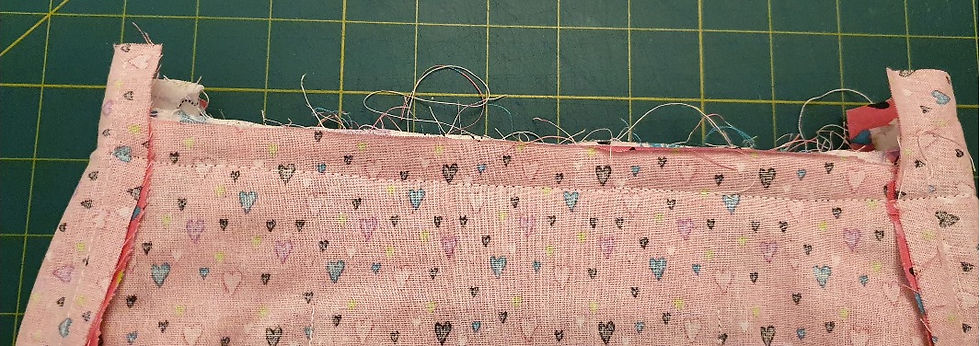
11. Turn outer right side out and lining wrong side out. Place the outer inside the lining. Line up the tope edge and side seams. Stitch in place.
12. Unpick some of the stitching of the base of the lining, enough to feed the bag through.

13. Pull the bag and lining through this hole, right sides out. Press the seam well.
14. Using a ladder stitch close the seam in the bag lining. Press well.

15. Stitch the large button in the middle of the front yolk, bring loop over to fasten.

To see more from Stephanie, visit her on Instagram @stephanie_j_marsh
Made by Stephanie Marsh for The Craft Cotton Company 2020


Comments