

Brick Layer Floral Lap Quilt
- Craft Cotton Co

- Mar 2, 2021
- 3 min read
Project by Gill Rich

Lap Quilts are ideal in the cold winter months to cosy up with on the sofa. They’re not too big but big enough to keep you warm. Why not give this one a go, it’s fairly easy to do and you can make it in no time. I find it's best to use fabrics that aren’t too fussy as you will lose the impact.
Approximate size 32” x 50”
You will need the following to complete your quilt:-
● Two bundles of fat quarters with five different fabrics. I chose Ditsy Blender from the Craft Cotton Co
● Cutting mat, ruler and rotary cutter.
● Coordinating thread, I used Gutterman Thread in light grey
● Backing fabric, 1.5m
● Wadding. I used Heritage Premium Quilt Wadding mid-weight by the Craft Cotton Co.

Firstly you need to cut your fabrics as follows:-
From your five fabrics, you need to cut 56 rectangles measuring 8.5” x 4.5”. You then need to cut 7 of them in half so that they measure 4.25” x 4.5”.
Choose one of your fabrics to be the focal fabric, the one that lies in a diagonal line across the quilt, I chose the pink one.
The basic pattern of this quilt is like building a brick wall. Starting at the top, layout your pieces, you need four full pieces for this row. Taking your “focal” fabric, this needs to be the second full piece on the left and place your other fabrics, one to the left and two to the right. The next row is three full pieces and two halves.

Place your “focal” fabric so that half of it is underneath the one on the top row and then place two pieces to the left and one piece to the right.
Continue in this manner until your “focal” fabric is at the left hand end. You will also need to place one on the same row but at the far right and fill in the two pieces in between.

Carry on again until you have completed 14 rows. If you aren’t happy when you have placed all your fabrics down, you can move them about until you are happy with it.
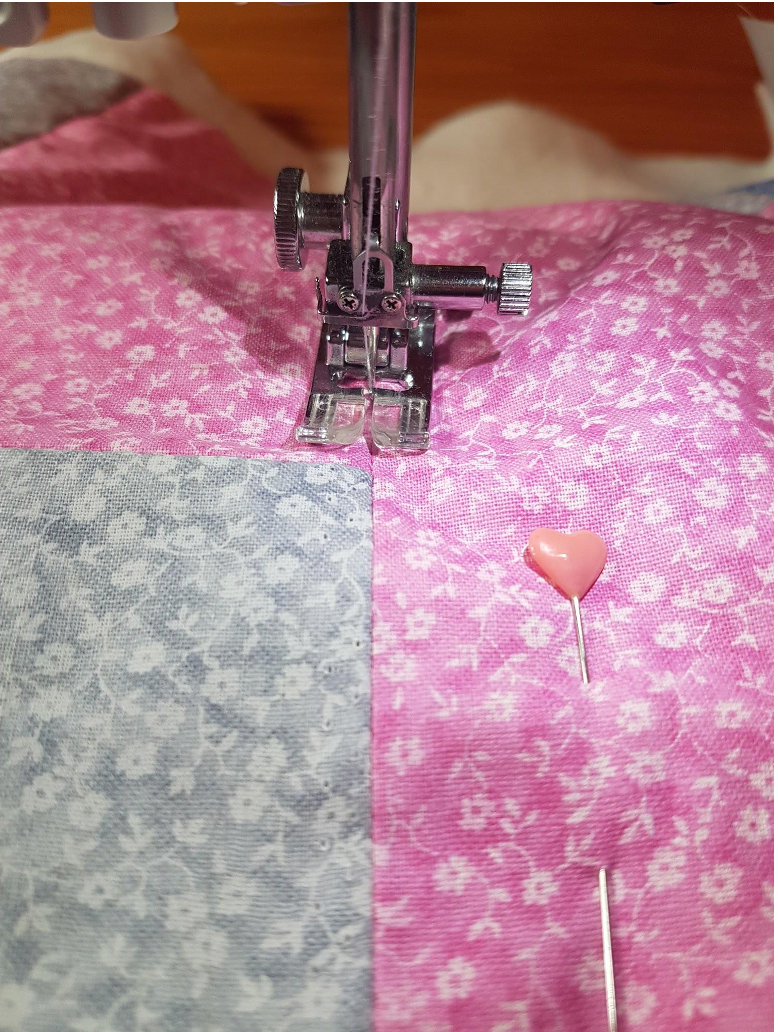
Now to sew them together. Starting at with the top row, stitch the pieces together using ¼” seam allowance. Press your seams open, or by your preferred method.
Taking each row, sew all the pieces together and press the seams.
Once you have completed all the rows, you now need to sew your rows together using ¼” seam allowance. Again press your seams open.

Once all the pieces have been stitched together, give your quilt top a good press and square off.
Take your backing fabric and place it on a flat surface wrong side up. Next place your wadding on top and finally your quilt top right side up. Pin in place using lots of pins to stop your “sandwich” from moving when stitching.

Now to quilt your lap quilt. I chose to “stitch in the ditch”. I used a thread which would co-ordinate with all the fabric, a light grey.. I started in the middle and worked towards the ends. Once you have done the long rows, you will need to do all the short ones in between.
Once you have finished quilting, square off your quilt sandwich so that all the edges are even. You are now ready to finish it off.
To finish off your quilt, you will need to bind the edges. I chose to bind the edges in the black fabric. Cut strips of your chosen fabric 1.5” wide. I joined two pieces together to do the shorter edges and 3 pieces for the longer edges. Sew to the front of the quilt. Fold over ¼” of the raw edge and hand stitch to the back of the quilt.

Your quilt is now complete.
I hope you enjoyed making this quilt. Please follow me on Instagram @designbygill66 or Facebook at Design by Gill.

Made by Gill Rich for The Craft Cotton Company 2021


Comments