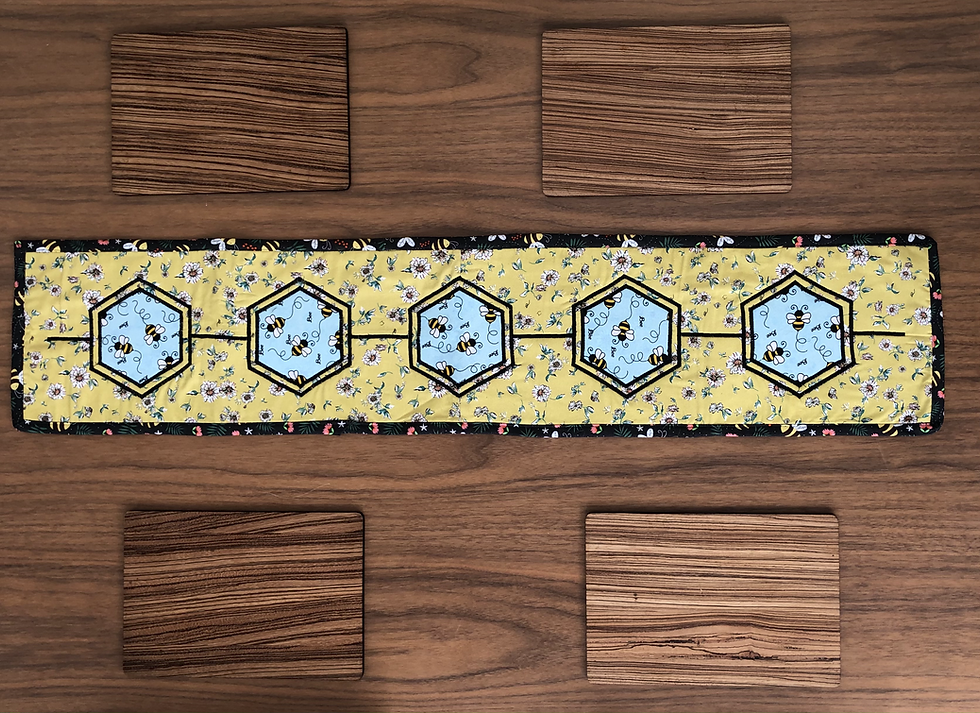
Buzzy Bee Table Runner
- Craft Cotton Co

- May 20, 2021
- 3 min read
Project by Rebecca Cole

Bees are one of my favourite animals! And so important to our planet! And they are also cute and fuzzy and should be celebrated! So why not do so by inviting them to your table…in the form of this gorgeous table runner.
Time to Make:
3-4 hrs
Skill Level:
Beginner/Intermediate
You Will Need:
· Bees FQ pack
· Wadding or batting 45” x 9.5” (113cm x 24cm)
· Sewing machine
(optional sewing machine accessories/stitches that can help: ¼” foot, walking foot)
· Complimentary sewing thread
· Straight pins
· Tape measure
· Fabric scissors or rotary cutter
· Iron
· Safety pins
· Brother Scan and Cut (optional)
· Vlieseline Bondaweb
· Washaway fabric pen and ruler
Method
1. Cut a 30cm square piece of fabric and back it with bondaweb. Insert it into your Scan and Cut and cut out 5 x 13cm (point to point) hexagon shapes. If you don’t have a Scan and Cut, you can do this step by hand.

2. Fold the yellow flower fabric in half lengthways and cut in half. Seam the two pieces together along the short edges and press the seam.

3. Position the hexagon shapes along the centre of the yellow fabric panel, evenly spaced. They should sit approximately 10cm from the ends and 10 cm in between each one, and about 6cm from the edges. Fix them in place with a hot iron.

4. Repeat step 2 with your backing fabric.

5. Lay your backing fabric down on your work surface right sides face down. Next lay your batting on top. Finally lay your top fabric down on top of this, face up so that you have created a batting sandwich with all wrong sides inside. Take some large safety pins and, starting from the middle, pin all three layers together at regular intervals, smoothing the layers as you go. This will hold everything together.


6. Cut 3” strips of fabric and join them together until you have a long enough strip to go all the way around your runner, approx. 3m. Press the strip in half lengthways.

7. Starting halfway down one of the sides, line the raw edges up with the raw edge of the runner. Open out the strip fold and fold the corner down diagonally. Start to stitch along the edge until you have gone about 1cm further down than the bottom of the diagonal fold. Lift the needle out of the machine and raise the presser foot so that you can remove the runner from the machine. Fold the strip in half again and reinsert into the machine, starting the seam from about where you stopped. Continue all the way down to the first corner.


8. When you reach the corner, stop ¼” from the end and secure with a couple of back stitches. Cut the thread and lift the project out of the machine. Turn the runner so that the edging you have just stitched is horizontally to the left of you. Lift the strip up away from you, at right angles to the line of stitching you have just sewn, creating a diagonal edge along the corner. Fold the strip back down towards you so that it is running along the next edge of the runner. Place the runner back under the machine and start sewing from the top edge along this new side, securing with a couple of back stitches to start. Repeat for the following 3 corners.


9. As you go around the edge of the runner and finally arrive back at the point you started, cut any excess length from the binding strip and tuck the end inside the diagonal pleat/pocket you made at the beginning. You can now sew over this join to securely and neatly close the edges.

10. To finish off the binding, turn the runner over and fold the folded edge of the binding over the raw edges. Seam in the ditch to close.

11. When you reach the corners, fold the strip over to form a mitred corner. Stitch in place. If you prefer, you can do this step by hand.


12. Select a zig zag stitch on your machine and set the stitch width to 5.0mm and the length to 0.2mm. Stitch all the way around the edge of the hexagon, appliqueing in place securely. Repeat with a second line of stitching around the shape, using the edge of your sewing foot as a guide.


13. Using the fabric marker, mark a line between each hexagon in the centre. Satin stitch along these lines to complete your table runner.


To see more from Rebecca, visit her on Instagram @becky_cole_sews
Made by Rebecca Cole for The Craft Cotton Company 2021


Comments