

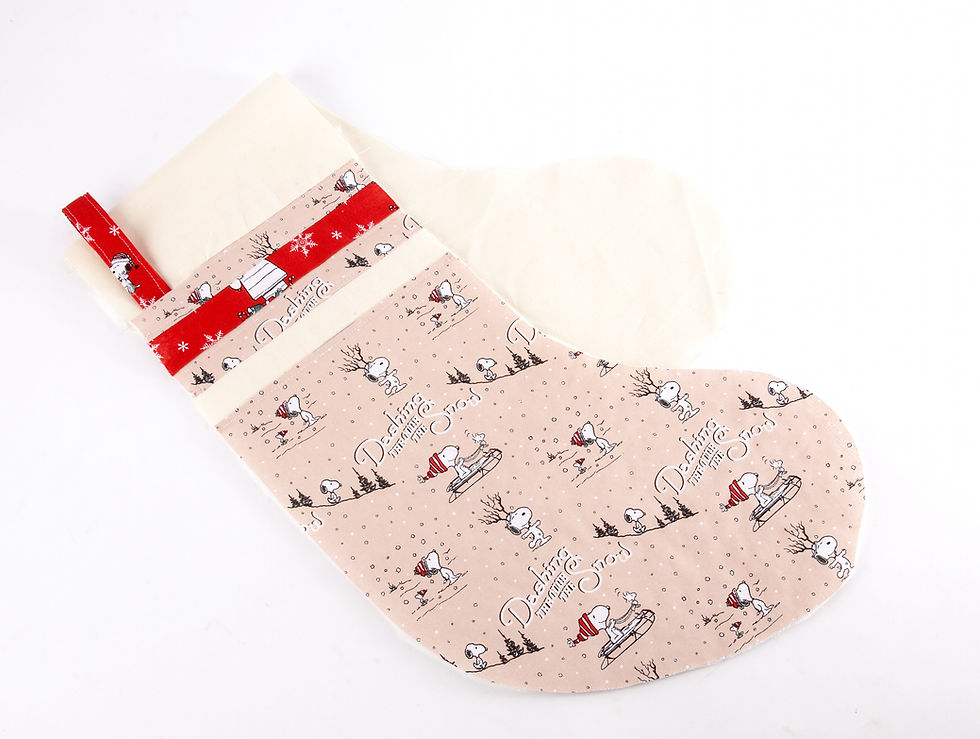
Snoopy's Christmas Fun Stocking
- Craft Cotton Co

- Sep 4, 2021
- 2 min read
Project by WhatKimberleyMakes

Finished size:
Approx. 26 x 40cm
Use a 6mm seam allowance
What you’ll need:
56cm x 50cm main fabric
66cm x 50cm plain lining fabric
56cm x 15cm contrast fabric
56cm x 50cm wadding
A3 Paper, ruler and pen to make a template
Basting Spray (505)
Erasable pen and ruler (for quilting)
Cut:
I piece of main fabric measuring 56 x 31cm
2 strips of main fabric each measuring 56 x 4cm
1 strip of contrast (red) fabric measuring 56 x 4cm
One strip of plain lining measuring 56 x 4cm
For the hanging hoop, cut 1 piece of red fabric measuring 10cm x 24cm
Method
1. To make your stocking template, draw a box measuring 18cm x 31cm along the right-hand side of your paper. Hand-draw a curved ‘sock’ shape from the bottom of the box to the right side of the paper. Cut out the shape.

2. Sew the plain lining strip to the top of the main fabric, followed by a main fabric strip, then a red, then a main fabric, all right sides together.

3. Use your template to cut out two mirror-imaged shapes from the fabric.

4. Cut your lining pieces from the same template this time make them 4cm longer.

5. Quilt diagonal lines across the main part of the stocking 5cm apart (Cross-hatching.) You may want to mark the lines first with an erasable pen.

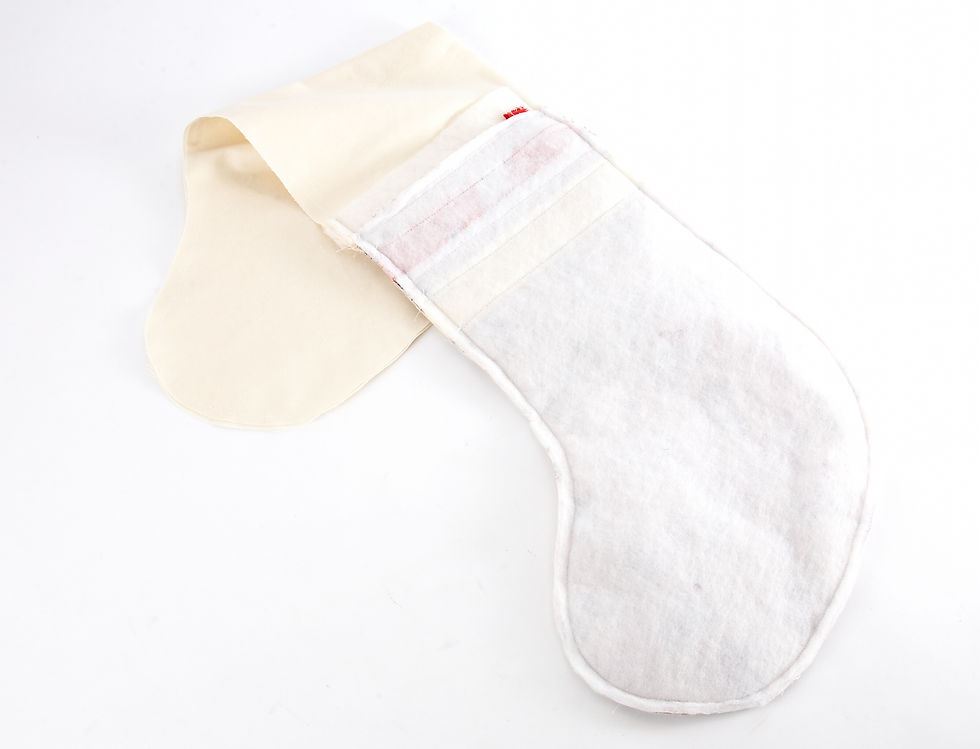
6. Cut two strips of wadding each measuring the width of your stocking x 2.5cm. Adhere to the top of each lining piece, 6mm from the top. Make sure the lining pieces are mirror imaged.

7. Fold the long sides of the hanging loop to the centre, then in half again and edge stitch along each side. Fold in half and sew, facing downwards to the side of the back seam, towards the back of the stocking.
Sew the top of each outer stocking piece to the top of a lining.
8. Sew the two panels right sides together, matching the outer and lining sides. Leave a turning gap in the lining of about 10cm. Snip into the curved seams.
9. Turn the right side out and sew the opening closed.

10. Push the lining inside the stocking. As you’ve cut the lining longer, this will create a border around the top.

11. To make the bow, cut a 19 x 18cm piece of red fabric. Fold in half lengthways right sides together and sew, leaving a turning gap in one side of about 4cm. Snip across the corners, turn the right side out and press.

12. For the tails, cut a strip of red fabric measuring 40 x 20cm, fold in half lengthways and trim across the ends at an angle.

13. Sew, leaving a turning gap of about 3mm in the centre. Turn the right side out and press.

14. Cut a length of red fabric measuring 11cm x 12cm. Sew the two long sides right sides together to form a tube. Turn the right side out and press with the seam at the back.

15. Wrap this piece around the centre of the previous rectangle to form a bow, hand sew at the back.

16. Thread the tails through the back of the loop and hand sew in place.

17. Sew the to red band at the top of the stocking.

To see more from Kim, visit her on Instagram @whatkimberleymakes
Made by Kimberley Hind for The Craft Cotton Company 2021


Comments